

The memory of the most glorious gingerbread house, at a Christmas family gathering has become a core memory. I’m not sure if it was the awe of so much candy in one place as a young child or the elegance of the icing snow icicles, candy trees, or round peppermints for windows that just enamored me. Never the less, the love of gingerbread houses was born.
My Pinterest board had several awe inspiring houses that dreams where made of. I have come to find though that realistically I don’t have the skills nor the patience to build such lofty endeavors. Plus, I’m not that found of gingerbread. Combine that with the young ages of my kiddos smaller is better for now.
We’ve done the store bought kits but they are always a little lack luster in my opinion. There’s never enough candy. The gingerbread is not enjoyable to my kids and the price is just ridiculous. Plus if you have several children or a large group it’s not very feasible. So I will be sharing how we make our own DIY versions. This is completely customizable to your preferences and needs.
What you need to build a DIY gingerbread house kit:
- Graham Crackers or Gingerbread
- Royal Icing (this recipe worked great)
- Candy or other treats for decorating
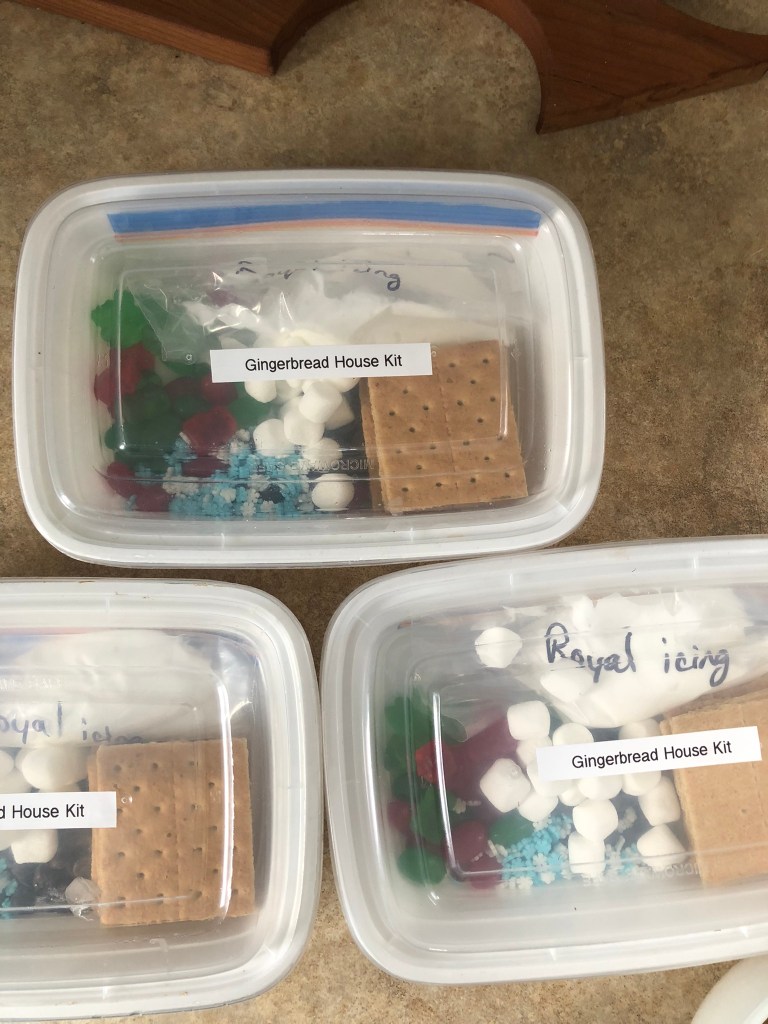
- Small Ziplock bags
- Container big enough to hold everything (Reused Chinese take out containers worked for me or something like this could be an option.
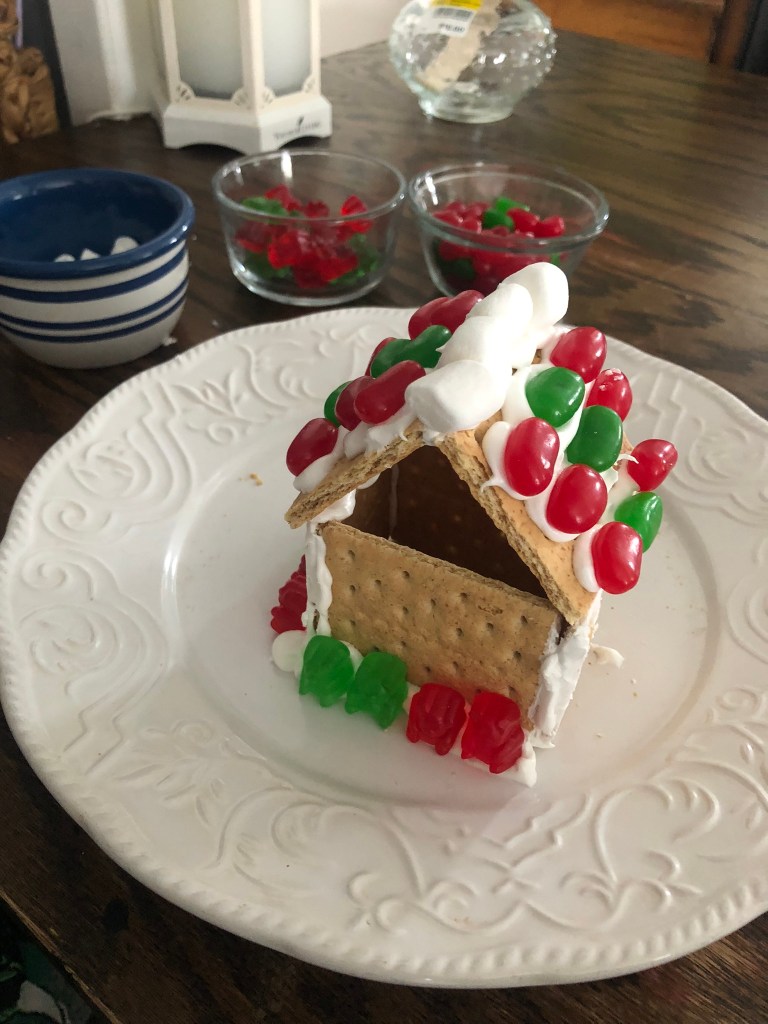
Graham Crackers are really easy. The shape and perforated middle line in them make it easy to cut and create any size house you wish. The taste of them is also more preferred for my kids so we don’t end up wasting any. To make the size house pictured you need 3 crackers broken in half so you end up with 6 square pieces.

Royal icing is an egg white based icing that dries very hard when exposed to air. The recipe I used made enough for 5 generously filled small bags of icing. The kids had lots left over by the time they had completed their decorating.

Candy or other treats – this is where it can get expensive or as cheap as you want. Yes you can go splurge on all kinds of special holiday themed treats. I like to keep it simple. If I’m planning ahead to do this project I may buy a few special packages of candy. But I always dig through the pantry first. Things like marshmallows, chocolate chips, sprinkles, and even dyed sugar could be used to decorate. Some people even set aside some of their Halloween candy for this holiday activity. Just remember, little fingers tend to get more in their mouths then on their houses.

No need for fancy icing bags. Simply fill a small ziplock bag with icing. There will be less mess as it will stay sealed and you just cut a small tip in one corner of the bag when you’re ready to decorate. If you’re giving these kits to someone out of your household, I’d suggesting labeling the bag and drawing a line where to cut.

Using a container to put all the supplies in for induvial kits can save prep time and likely a few squabbles if you’re doing this for multiple children. It’s also an great holiday activity you can gift to others. I just reused Chinese take out containers. You could even just use a gallon size Ziplock, all though the crackers would risk getting broken I think.
I hope you enjoy making some Christmas magic with this activity.
Merry Christmas!
The Sunflower Homemaker

Leave a comment